 Block Programs
Block programs are the core of Autopilot 1x. In this menu, all flight control algorithms can be found, divided in different independent programs with different functions. All programs are executed at GNC (Guidance-Navigation-Control) time.
A Program is a custom algorithm executed by Autopilot 1x. While their main purpose is the control of the aircraft, Programs can be used to develop a wide variety of applications, from simple math operations to complex estimation filters.
Block programs provide the user with a block programming interface that 1x will then execute at core frequency. The fact that it is designed in this way gives it a high versatility, unlimited freedom and mimo control capabilities. This high versatility is thanks to this block programming interface, as they are easily manageable and highly customisable blocks, so that each customer can perfectly define their control algorithms regardless of the vehicle and the target they have.
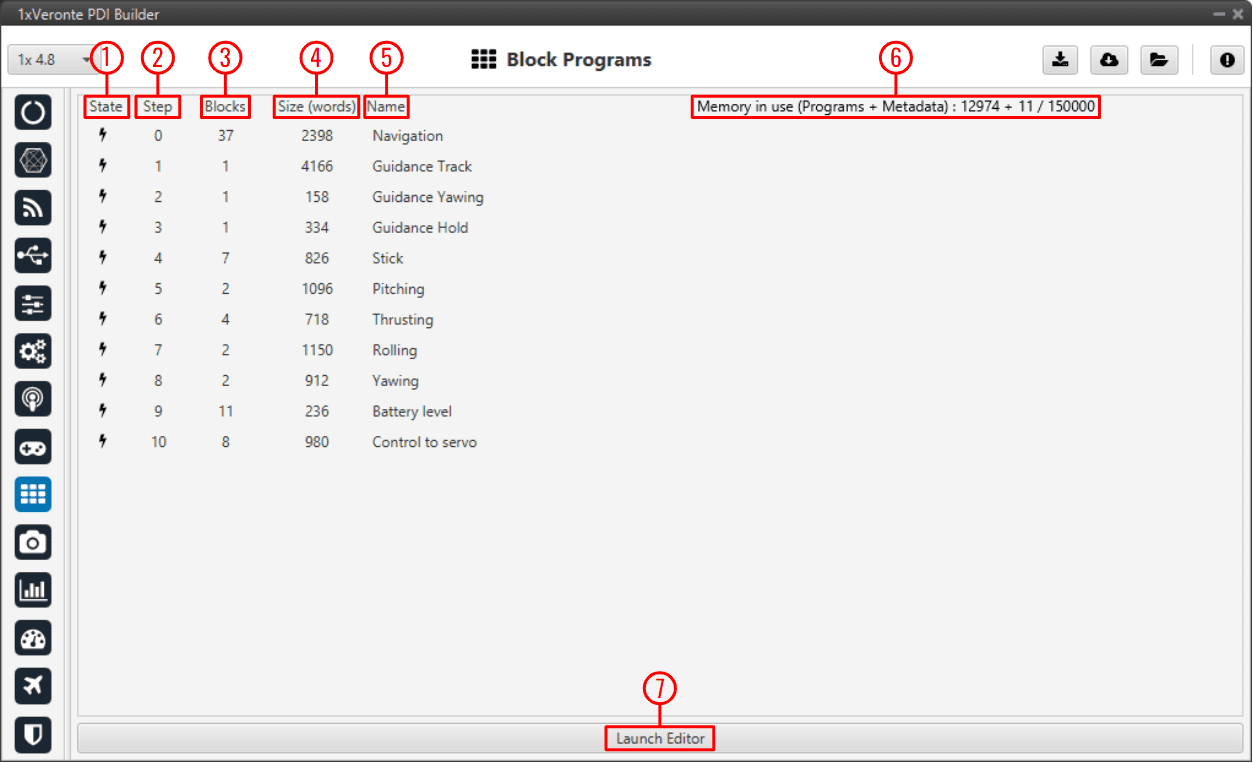
Block Programs menu
State: There are two types of programs, those with a black lightning symbol and those with a grey lightning symbol.
The black ones are programs that are executed periodically, at core frequency. While those with grey lightning are only “active” when they are executed using an automation (Run Block Program, see Actions - Automations section of this manual).
Step: This number determines the order of execution of the programs.
Blocks: This indicates the number of blocks in each program.
Size (words): This is the memory taken up by each program.
Name: Program name, it is set by the user.
Memory in use: It is the operation performed to calculate memory in use.
Launch Editor: Click here to start configuring a program. A new window will appear:
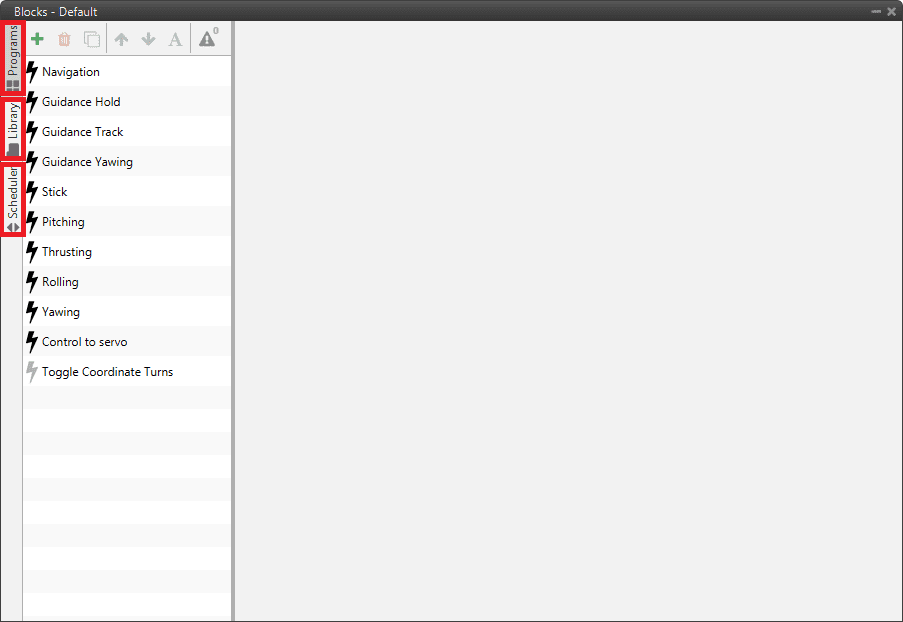
Block Programs tabs
Scheduler: In this tab users can configure the frequency (in Hz) at which each program is executed.
By default the GNC frequency is defined for all programs, however, the user can modify it by pressing the ‘+’ and ‘-’ buttons next to the frequency.

Block Programs menu - Scheduler
If the user reduces the frequency of a program, it is possible to move it so that the the programs run in different slots:
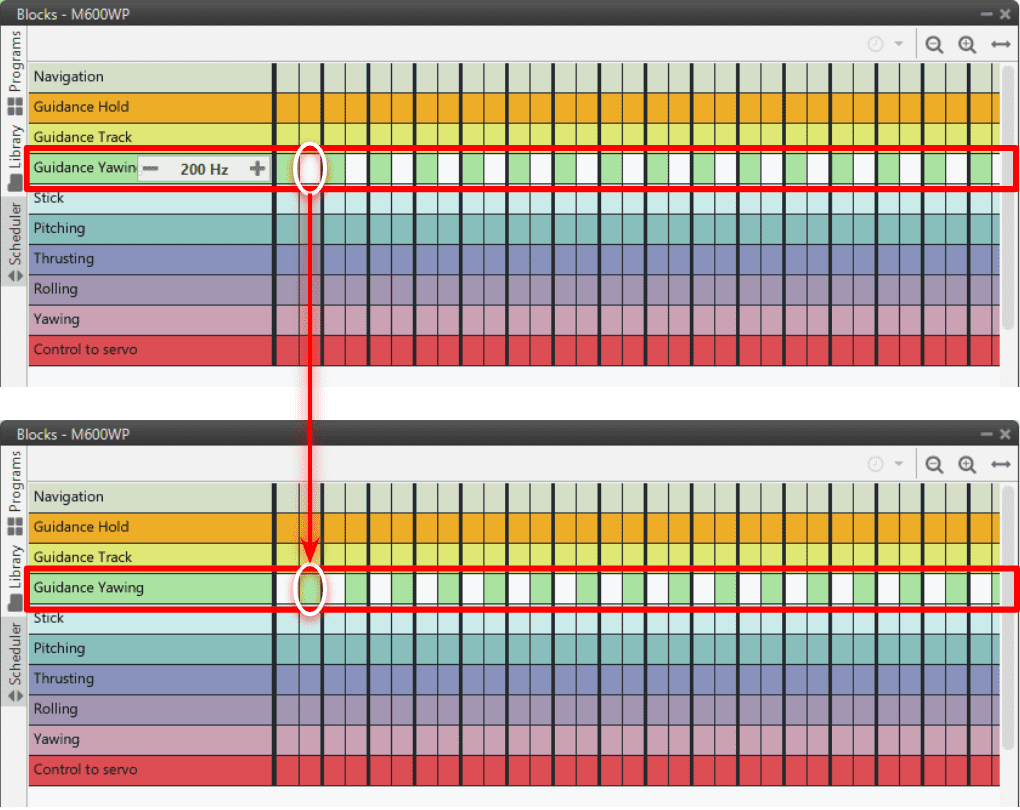
Block Programs menu - Scheduler slots
Important
If the program is not executed periodically (grey lightning symbol), it will not appear in the Scheduler tab.
Library: Here the user can create custom blocks. This tab is explained in more detail in Library blocks section.
Programs: All Block Programs are created and configured in this tab:
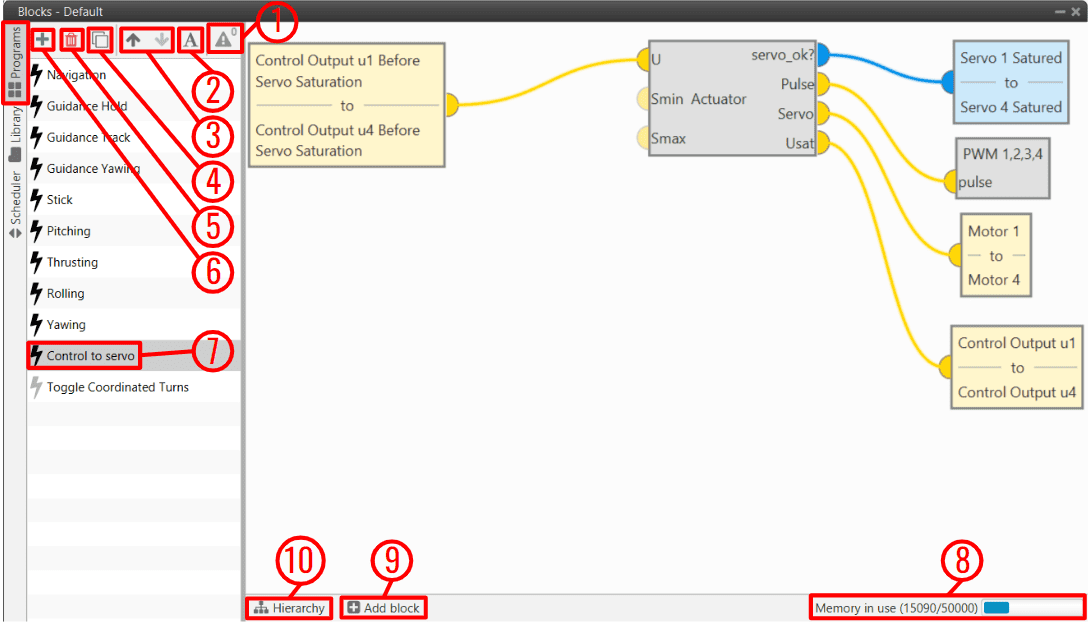
Block Programs menu - Programs options
Move to error
 : When there are errors or warnings, the number of errors/warnings is displayed here and by clicking on them, 1x PDI Builder takes the user to the program with that error.
Block Programs menu - Move to error
Change name
 : Rename a selected program.
Move up/down
 : Use them to determine the order of execution of a selected program. Programs are executed from top to bottom.
Copy program
 : Copy a selected program.
Remove program
 : Remove a selected program.
Add program
 : Add a new empty block program.
State and name of program. Clicking on
 icon will toggle the execution mode.
Memory in use: Estimation of the remaining memory available. If no more memory is available, no new blocks will be allowed to be created. The allocated memory for each block depends on the block type.
Attention
User must be aware that each block has its own size, so the larger the size of a block, the more space it will take up.
Thus, the more programs are created, the more space is occupied.
In addition, there is information stored as metadata about the organization and position of each block in the diagram that also represents part of this space.
Tip
To optimize memory, it is better to use more but smaller blocks than one large block.
Add block: By clicking here, a new column panel will appear where users can choose the block they want to add.
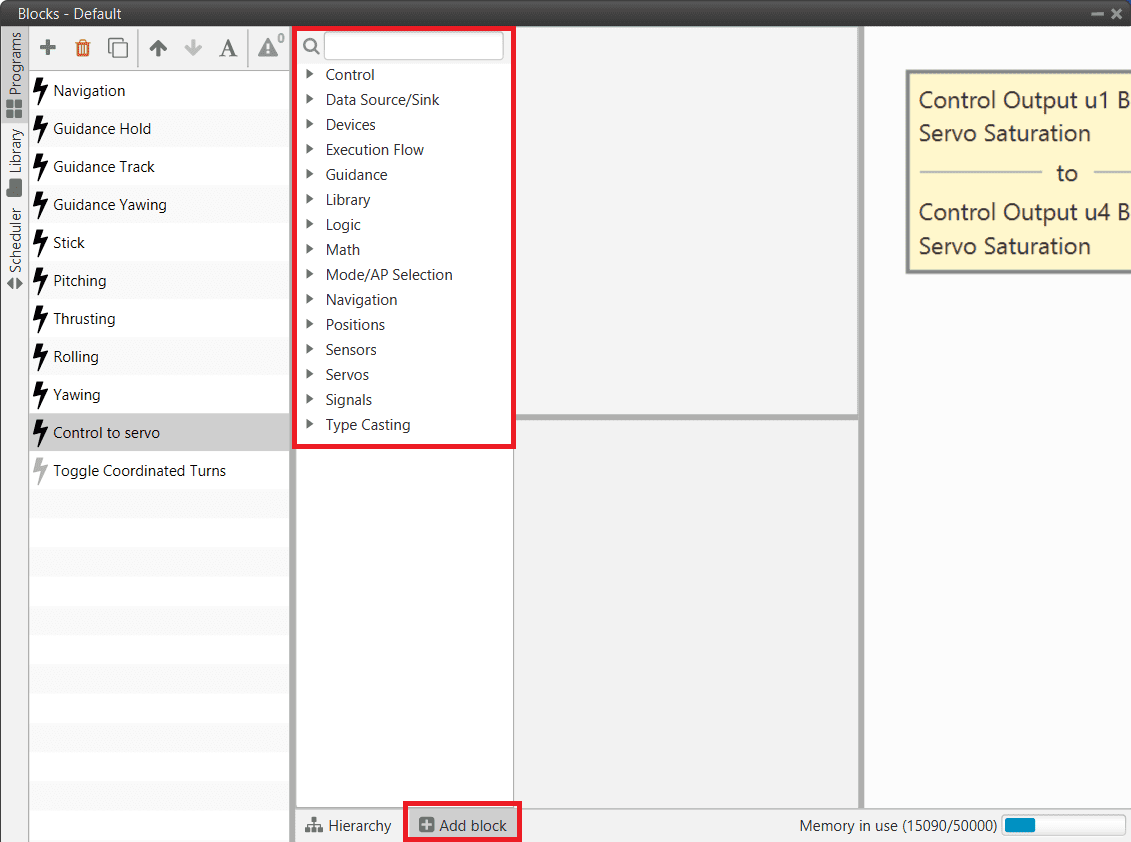
Block Programs menu - Add block panel
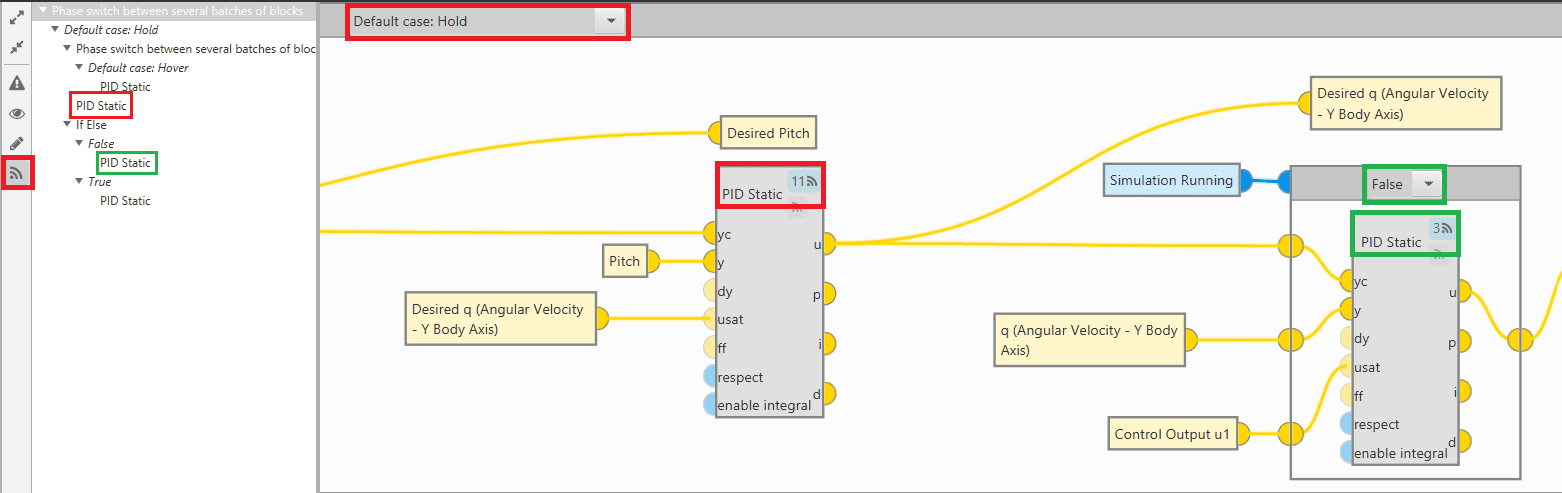
Hierarchy: By clicking here, a new column menu will appear where users can see “information” about the existing blocks on the selected program.
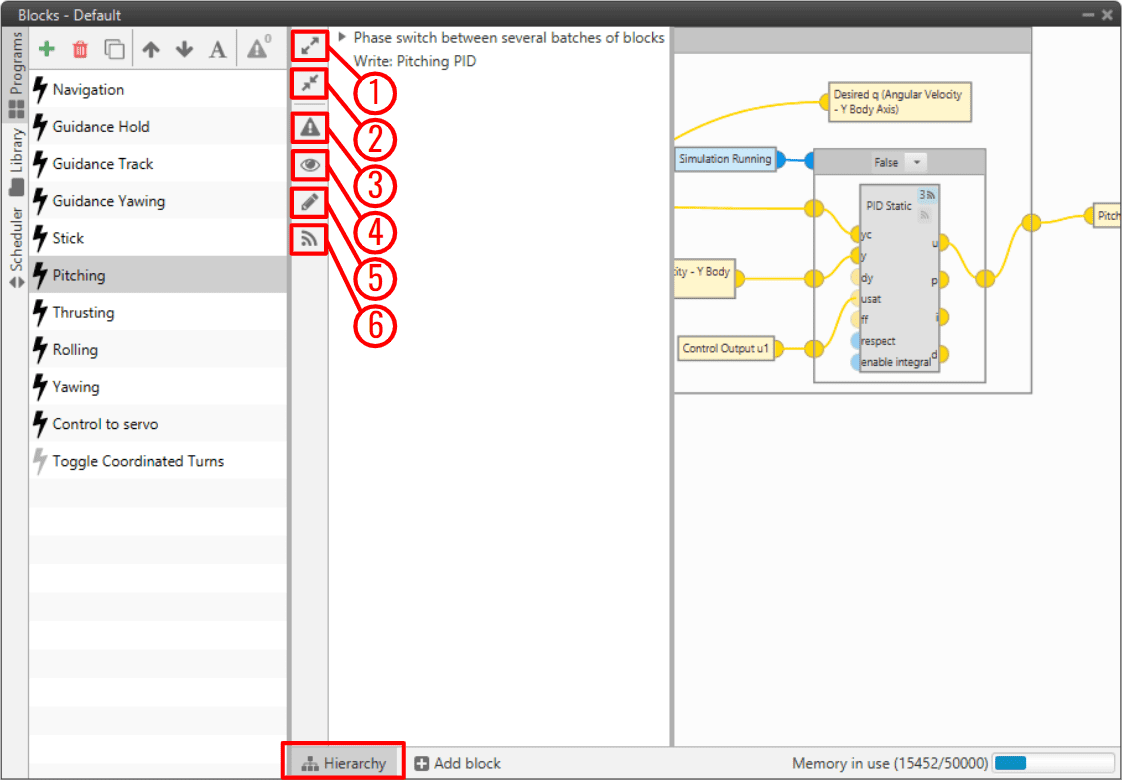
Block Programs menu - Hierarchy panel
Expand All: By clicking on it, all menus that are collapsed will be expanded, e.g. in programs that have Switch blocks.
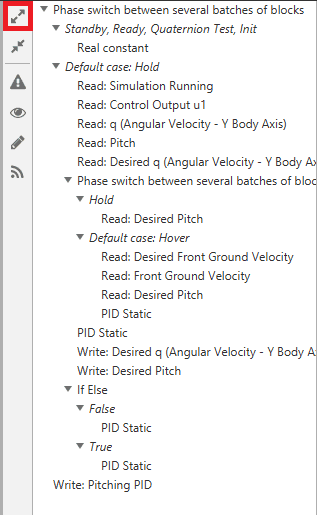
Expand All
Collapse All: By clicking on it, all menus that are expanded will be collapsed, e.g. in programs that have Switch blocks.
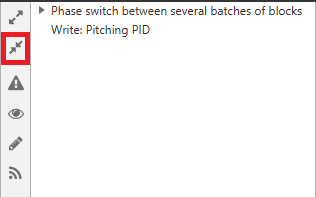
Collapse All
Show blocks with errors:
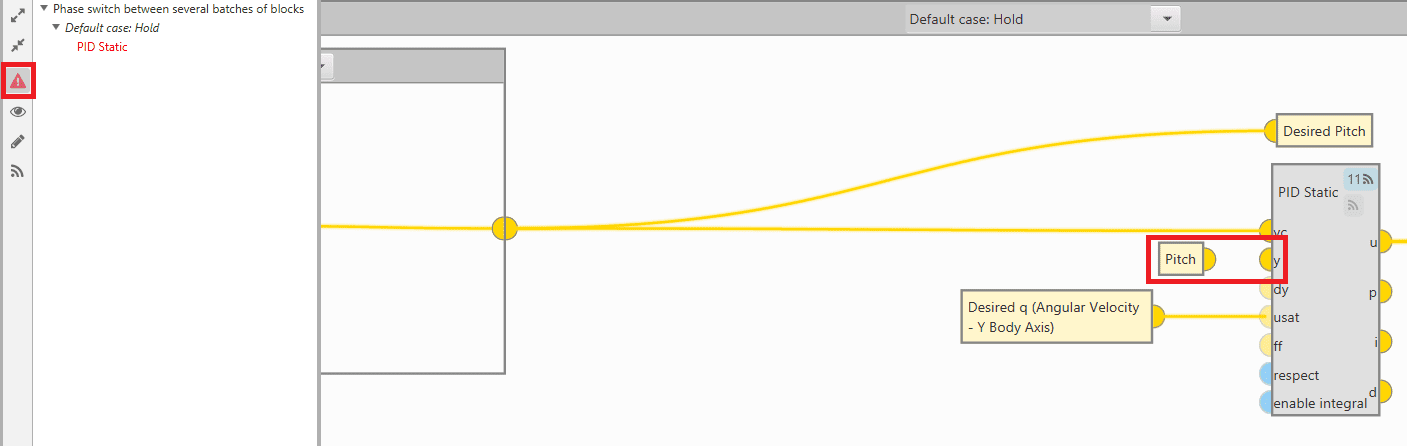
Show blocks with errors
Show blocks that read from variables:
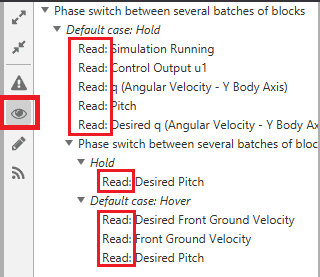
Show blocks that read from variables
Show blocks that write in variables:
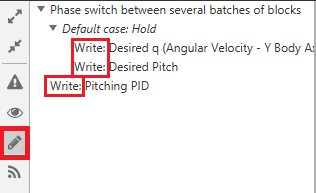
Show blocks that write in variables
Show blocks that can be commanded:
Show blocks that can be commanded
Blocks
To add a block:
Click on ‘Add Block’.
Search and select a block. When a block is selected, its description is displayed.
Click and drag it to import into the program.
By right clicking on a block, the user can:
Edit: This options opens its configuration menu. It is also possible to open the configuration by double clicking on the block.
Remove block: Remove the selected block.
Copy: Copy the selected block.
Paste: Paste the block that has been copied.
Change constant value/variable/variables: User can change the constant value entered/the selected variable/s, e.g. to be read or written.
Note
Only available for Data Source/Sink blocks.
To re-locate blocks, just click and drag them.
Block Programs menu - Adding blocks
Block inputs and outputs use a color code in order to indicate variable types:
 : 32-bit Real variables.
 : BIT Boolean variables.
 : 64-bit Feature variables.
 : 16-bit Integer variables.
 : Position measurement data.
 : Guidance data.
 : Sensor data for EKF.
Note
Connectors can also be Arrays of variables.
An input and an output can be linked directly with the mouse and unlinked by right clicking on the input/output:
Linking blocks
Note
An input and output with different variable types cannot be linked without a Type Cast block. For more information on this block, see Type Casting blocks section of this manual.
Type Casting block
All inputs of each block must be connected, otherwise 1x PDI Builder will report an error. Outputs do not need to be linked.
Errors in blocks
An exeception of the previous rule are translucid inputs
 , which are optional. These inputs will have a default value if not linked.
The different types of blocks available in Block programs are:
Control: Control-related blocks (PID Static, Tsched PID, ECU control etc.).
Data Source/Sink: Input/Output blocks. Programs can have access to any variable available within Autopilot 1x system. Results can then be stored in User Variables for display, use as a different program input, feedback, etc.
Devices: These blocks allow to configure devices connected to the autopilot.
Execution Flow: Programming-like blocks for operation flow control. These blocks allow to alter parts of a program depending on a condition (If-Else, Integer Case, Phase Case, etc.).
Guidance: In these blocks the guidance of the flight phases is configured.
Library: Blocks created manually combining already defined blocks. They are created in the ‘Library’ tab which can be accessed on the left hand side of this menu.
Logic: Logical gates to operate with boolean variables (AND, NOT and OR).
Math: Mathematical blocks, which include a variety of mathematical operators: basic (sum, multiply, square root, etc.), trigonometric (sine, cosine, tangent, etc.), vectors (norm, dot product, rotations, etc.).
Mode/AP Selection: Blocks that allow to interact with flight modes and redundancy (Autopilot 4x).
Navigation: These blocks allow the autopilot navigation to be configured.
Positions: Blocks for operating with position-type variables (create position, read position, relative position, etc.).
Sensors: In these blocks, some of the sensors are configured.
Servos: Blocks related to servos configuration.
Signals: Blocks for signal processing (IIR filter, rate limiter, etc.).
Type Casting: Blocks for variable conversion (Real to BIT, Integer to real, etc.).